Stone Stew

Stone Stew

Winter in Ireland means stew becomes a regular menu feature. Irish stew is a world famous dish, but one that won’t feature in this house of vegetarians. Still, we need the heartiness and the warm filling elements of stew. I decided that’s what we needed last night.

Initially, I was going to whip up some Mulligatawny Soup but quickly realised I didn’t have all the ingredients. My health has taken a beating recently, and I wasn’t up to going to the shop, so dinner was going to have to be a stew version of Stone Soup.

This amount produces about 12 servings.

Ingredients

2 Potatoes
2 Yellow Onions
1 Tablespoon of Ginger Garlic Paste
1 Tablespoon of Coconut Oil
10 Dried Chillies
2 Green Apples
1 400ml Tin of Tomatoes
1 400ml Tin of Coconut Milk
1 400g Tin of Chickpeas
2 Teaspoons of Cumin Powder
2 Teaspoons of Cumin Seeds
1 Teaspoon of Ground Cinnamon
1 Tablespoon of Curry Powder
1 Teaspoon of Turmeric Powder
1/2 Teaspoon of Ground Cardamom
1/2 Teaspoon of Ground Mango Powder
1 Teaspoon of Dried Thyme
1 Teaspoon of Dried Rosemary
1 Cup of Red Lentils
1 Tablespoon of Freshly Ground Pepper
1 Tablespoon of White Balsamic Vinegar
1 Litre of Vegetable Stock
500g of Frozen Brussels Sprouts

Peel, and chop the onions.
Heat the coconut oil in a large saucepan.
Add the onions, dried chillies, and cumin seeds.
Sauté until the onions are soft – about ten minutes.
Add the ginger-garlic paste, herbs and all the spices.
Lower the heat, and cook, stirring, for another five minutes.
Add the vegetable stock and lentils.
Bring to the boil.
Add the Brussels sprouts, tomatoes, vinegar, salt and pepper.
Turn the heat to low and leave to cook – stirring occasionally – for about 40 minutes.
Stir in the chickpeas, and coconut milk.
Cook for a further ten minutes.

Serve with rice, pasta, or crusty bread.

Kala Chana Soup

Soup

Soup is one of my favourite things – but only if drunk from a mug. It’s comfort food; especially as the days and nights get colder. We had a bag of kala chana in our house – which lead to some interesting musings about who ate them first, and how they decided that these stone-like things could be rendered edible after lots of soaking and boiling – and we decided to soak and boil them all up at once.

The result? A large pot full of cooked kala chana. We made some into curry, some we roasted and prepared chaat with them. And we still had cups of the stuff left. The obvious solution was to turn them into soup. It’s delicious, and worth resurrecting this blog for!

Ingredients:

2 tablespoons of vegetable oil
1 tablespoon of sambar powder
3 teaspoons of cumin powder
3 teaspoons of chili powder
6 tablespoons of unsweetened desiccated coconut
2 tablespoons of ginger-garlic paste
1 litre of vegetable stock
400g of tinned tomatoes
500mls of hot water
14 tablespoons of cooked kala chana
Salt to taste

Method:

In a large saucepan, heat the oil over a medium heat.
Add the cumin powder, sambhar powder and dessicated coconut.
Stir until the powders release their fragrance, stirring to ensure they don’t burn.
Add the ginger-garlic paste and continue stirring until the raw smell goes off the the mixture.
Add the stock, water, and tomatoes.
Turn the heat up, cover the saucepan, and bring to the boil.
Add the kala chana and turn the heat back down to medium.
Simmer for 10 minutes.
Turn the heat off, season, and blend with a stick blender.

Have on its own, or serve with bread, noodles, orzo, or rice.


Warm(ish) Salad with Tahini Dressing

It occurred to me that it was a while since I’d made hummus, and as I had a brand new jar of tahini, I thought today might be the day to put that right. Then, I noticed that there were a few odds and ends in the fridge this morning and I decided to combine them in a salad and use the tahini in a dressing.

So this is what we ended up with:

Tahini-Dressed Salad

Warm(ish) Salad with Tahini Dressing

1 400g Can of Chickpeas
1 Courgette1
Red Bell Pepper
3/4 Bag of Rocket
8-10 Leaves of Mint
1 Clove of Garlic
2 Tablespoons of Tahini
2 Tablespoons of Olive Oil
Squirt of Honey
Juice of Half an Orange
Zest of a Lemon
Juice of Half a Lemon
Salt & Pepper to Taste

Open the can of chickpeas and toss them into a sieve.
Rinse them under running water and leave to drain.
Peel and finely grate the garlic.
Cut the courgette into small, thin, bite-sized pieces.
Cut and core the red pepper.
Make the dressing by combining the tahini, garlic, honey, zest, orange and lemon juices.
Mix gently and add a drop of water until it’s slightly runny.
Add the olive oil.
Whisk gently with a fork until you have a runny consistency.
Leave to one  side.
Gently heat a glug of olive oil in a frying pan and add the courgette pieces.
Fry them over a medium heat until they start to brown (about 10 minutes).
Add the pepper pieces and fry them for a further five minutes.
Turn the heat off.Get out a large bowl and throw in your chickpeas, rocket and the fried vegetables.
Pour the dressing over the combined vegetables and toss the lot together.
Scatter a few mint leaves over the top and tuck in!

Coconut ‘Chicken’ Curry

This is one of my favourites – full of flavour and not at all spicy, so you can serve it to anyone and they won’t be afraid of it. I was full sure I’d already posted this recipe until my friend Karen and her daughter, Ciara, came by for lunch. Ciara is also vegetarian and forever on the hunt for new recipes. She liked this curry, so I blithely told her ‘oh! It’s on the blog – you can easily download it from there’. Then I discovered it wasn’t, so I’m hastily typing this up so it will be by the time she looks later this evening!

Don’t let the long list of ingredients put you off – there is little to prepare out of the list, it’s more assembly than preparation, to be honest. I think I’ve mentioned this before (and if I haven’t, I should have!) but if you have a friend or two who likes to cook, it is worth your while to get a decent-sized bag of ground spices at your local Asian market and divvy it up between you. That way, you’re getting the value of the cheaper prices in these shops and you’re using up the spices before they go off. I am reminded of this because there are a few spices in this recipe that only call for a pinch, but you’d miss them if they weren’t there.

Coconut 'Chicken' Curry

Coconut ‘Chicken’ Curry

1 Tablespoon of Coconut Oil
2 Teaspoons of Cumin Seeds
4 Fresh Chillies
8 Cloves of Garlic
300g Quorn Chicken-Style Pieces
1 Teaspoon of Ground Turmeric
1 Teaspoon of Ground Mango Powder
1 Teaspoon of Ground Cumin
1 Teaspoon of Ground Coriander
1/2 Teaspoon of Garam Masala
Pinch of Ground Cloves
Pinch of Ground Cinnamon
Pinch of Ground Cardamom
1 400ml Tin of Coconut Milk

Peel and bash the garlic and ginger and chillies together in a mortor.
Heat the oil in a pot over a low heat.Add the cumin seeds, ginger, garlic and chillies.
Fry, stirring, over a low heat until the garlic is browning and the mix is releasing its fragrance.
Add the Quorn and mix it all together.
Cover and cook for about 10 minutes, stirring occasionally to ensure it doesn’t stick.
Stir in the turmeric, cumin, coriander, mango, garam masala, clove, cinnamon and cardamom powders.
Cook, stirring, for about three minutes.
Add the coconut milk and raise the heat a little until the mixture is bubbling.
Turn the heat down low, cover the pot and leave to simmer for about 10 minutes.

We had this with carrots and orange with chickpeas, wilted spinach with garlic and Mozzarella and plain, boiled brown rice.

Amaranth Patties

So, you remember the other day when I was extolling the virtues of quinoa? Well, hold the phone, honey, cos I’ve a new grain to tell you about and it’s got even more protein in it than quinoa and it’s less than half the price.  Amaranth. Gluten-free, heart-friendly and versatile, it’s also less than half the price of quinoa (in case you didn’t hear me the first time!).

I have given up wheat again because there is a direct link between consuming it and my waistline (and every other part of me) expanding. I really want to be strict with myself until I’m back in my clothes so no wheat – even though I love bread and pastries and pasta and…all the things that taste really good. This shunning of wheat means that I’m looking (again) at all sorts of grains and flours with which to prepare tasty meals.

So, yesterday, I cooked with amaranth for the first time, and made patties.

Amaranth Patty

Amaranth Patties

200g of Amaranth
400 mls of Water
1 Onion
5 Cloves of Garlic
Zest of half a lemon
2 Tablespoons of Curry Powder
1 Egg4 Slices of (gluten-free) Bread
150g of Hard Cheese
Salt & Pepper to taste
Vegetable (not olive) oil for frying

Peel and slice the onion.
Peel and pound or mince the garlic.
Turn the bread into breadcrumbs with your hand-blender, or spice grinder.
Bring the 400mls of water to the boil.
Add the amaranth to the pot in a steady stream.
Return to the boil and then lower the heat.
Leave the amaranth to cook for about 20 minutes.
When it’s done, the amaranth will look a bit like couscous that’s been cooked with too much water. Don’t panic! This is what it’s meant to look like. It will also be very sticky.
Heat the oil over a medium heat in a wok or frying pan
Add the onion, garlic, lemon zest and curry powder.
Cook, stirring, for about 5 minutes.
Turn off the stove.
When the amaranth is done, combine the onion mix and the grain in whichever pot is bigger.
Whisk the egg and add it to the mixture.
Add in the cheese.
Stir in the breadcrumbs and combine.
Add the salt and pepper.
Mix well.
Over a medium heat, heat some oil in wok or frying pan.
To shape the patties, I used a wooden spoon and a butter knife, scooping the mixture into the bowl of the spoon and un-sticking it directly into the pan with the knife. It keeps a reasonable shape in the pan.
Fry each patty for about one minute each side.

I got a batch of about 18 from this amount – I say ‘about’ because, as I fished them out of the pan and onto a plate, the grils swiped and ate them!

Beetroot, Quinoa & Rocket

I always forget how much I love beetroot until I end up with little else to prepare for lunch or dinner. Then, I break into a sweat and wonder what on earth I can do to make it interesting. This recipe was invented on one such day. Now, I’m not for a moment going to pretend that quinoa is a cheap food. It’s not. That is to say, a 500g bag retails at about €7.00 but that bag gets you get about sixteen servings (4 meals of 4 servings). There is no waste and it’s full of various vitamins, calcium, folate, magnesium, maganese, phosphorus and potassium. It’s also very low in sodium. At least, that’s how I justify it to myself every time I baulk at handing over so much money for half a kilo of tiny grains.

Beetroot and walnuts are one of nature’s obvious parings – like garlic and mushrooms or potatoes and leeks – so, in the spirit of ‘If it ain’t broke…’, I included them in this recipe.

Beets on Leaves

Beetroot, Quinoa & Rocket

125g of Quinoa
300mls of Water
2 Onions (I used red)
Knob of Butter
50g of Walnut Halves
2 Red Chillies (optional)
250g of Cooked Beetroot
2 Tablespoons of Lemon Juice
100g of Rocket Leaves (1 small bag)

Peel and chop the onions.
Wash the rocket if it’s not already washed.
Halve the walnut halves (so you have walnut quarters!)
Grate the beetroot.
Snip the chillies with a kitchen scissors.
Rinse the quinoa in a sieve under cold water.
Tip the grains in to a saucepan, cover with the water, and bring to the boil.
Once the quinoa is boiling, turn the stove down low and allow it to cook for another 15 minutes.
You know it’s done when the little ‘tail’ sprouts out the back of each grain.
While the quinoa is cooking, melt the butter in a saucepan over a low heat.
Add the onions, chillies and walnuts.
Stir them for a  minute or two, until they are covered with the butter.
Put the lid on the pan and leave to cook, stirring occasionally, for about ten minutes.
Then add the beetroot and stir.
Add the lemon juice and salt and pepper to taste.
Tip in the quinoa (which should have absorbed all the water).
Stir.
Empty the rocket into a large bowl.
Pour the beetroot and quinoa over the leaves.
We had this with boiled and buttered spuds.  Yum!

Mixed Veg Oven Baked Frittata with Rooster Wedges

This is another of those quick and easy recipes that we all need a slew of! I’d spent most of the day slaving over a hot laptop and it was 6pm before I knew where I was. I’d picked up 1.5kg of gorgeous little roosters in Lidl the other day for €0.79 and there was some frozen veg in the freezer and eight eggs in the fridge. Plenty for dinner, so!

Fresh Red Chillies

Oven Roasted Frittata

600g of Frozen Vegetables
4 Fresh Red Chillies*
8 Medium Eggs
100g of Feta Cheese
Salt & Pepper to taste

Heat your oven to 180.
Splash some oil in a frying pan and empty in the frozen vegetables.
Fry them up for about five minutes, until they are no longer frozen.
Pour the vegetables into an oven-proof dish.
Dry fry your chillies until they are slightly blackened – this makes them taste sweeter and less firey.
Tuck the chillies in among the vegetables in the dish.
Beat the eggs in a container with a fork.
Add the salt and pepper.
Crumble the cheese over the veggies.
Pour the eggs over the lot and pop it in the oven for 35-40 minutes.

Rooster Wedges

13 Small Rooster Potatoes (about 750g)
2 Tablespoons of olive oil
Salt & Pepper to taste

Put the potatoes in a pot with enough salted water to just cover them.
Bring to the boil.
Turn down the cooker and allow to simmer for ten minutes.
Drain the spuds and allow them to cool for a few minutes.
Once they are cool enough to touch, cut your potatoes in quarters lengthwise.
Toss in the oil, salt and pepper. (If you like, you can add some curry powder or sumac or whatever powder tickles your fancy).
Tip the spuds in to another oven-proof dish and roast them, in the oven with the frittata for about 35-40 minutes.

* Fresh chillies, in regular supermarkets are ferociously expensive – sometimes up to €1 for four of them! I bought nearly 50 of them yesterday in my local Asian supermarket for €1.27

Quick Mushroom & Kidney Bean Curry

This recipe was born because we needed to go shopping yesterday, but I didn’t feel like venturing out in pre-snow weather (not least because I was reading a terrific book – Rowan Coleman’s The Memory Book).  So I had a quick rummage in the cupboards and came up with this:

Mushroom & Kidney Bean Curry

1 Onion250g Mushrooms
2 Tablespoons of Sesame Oil
4 Teaspoons of garlic-ginger paste
1 Tin of Kidney Beans
1 Tin of Tomatoes
2 Tablespoons of Tomato Purée
2 Teaspoons of Cumin Seeds
2 Red Chillies
11/2 Teaspoons of Garam Masala
Salt & Pepper to taste

Chop the onion.
Chop the chillies (I use a kitchen scissors, it’s quicker, easier, and I’m less likely to end up with chilli hands).
Wipe the mushrooms and cut them in quarters.
Open the tin of kidney beans, drain and rinse in a sieve.
Heat the oil over a medium heat in a wok or saucepan.
Add the cumin seeds and fry gently until they release their aroma.
Toss in the onion and sautée, stirring often, until they are glossy and the raw smell has gone off them.Add the ginger-garlic paste and chillies.
Continue to fry, over a low-medium heat, for a minute or two.
Plop in the contents of the tomato tin and the tomato purée.
Swish the tin out with water and add that to the sauce as well.
Pop in the chopped mushrooms.Leave the lot to cook, for about 20 minutes, on a low heat, stirring often.
Add the drained and rinsed kidney beans and the garam masala.Stir.
Leave the lot to cook for another 10 minutes or so – just until the kidney beans are heated through.
I was going to serve this with rice, but it smelt like it needed chapatis, so I made those instead. 🙂

Nollaig na mBan

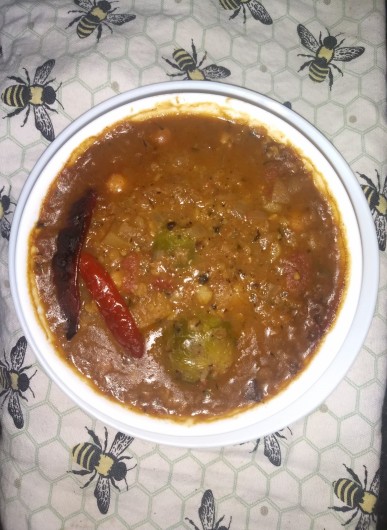
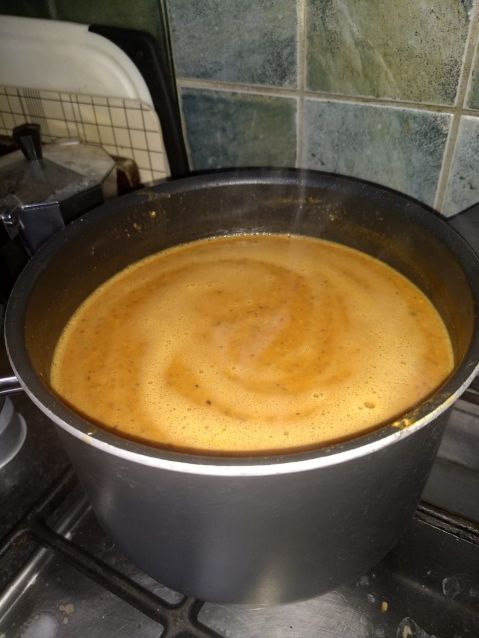
Last Tuesday – January 6th – was Nollaig na mBan.  For the past six (or maybe seven?) years, I have celebrated the tradition in my home by inviting several of the wonderful woman I am pleased to know into our home for dinner, drinks and chat. This year was no exception. About a dozen women joined me for dinner (my girls scarpered upstairs with plates – feeling at the same time both too old and too young to be in the same room as the rest of us).   I cooked a few dishes. We had red lentils with sweet and sour sauce (I made the sauce first, then rinsed two cups of red lentils, covered them with cold water, brought it to the boil with a teaspoon of salt, turned the heat down low and let them simmer for 40 minutes, then added the sauce).  Then we had  Moroccan ‘chicken’ with green olives and lemons, carrots with orange and chickpeas (which Ishthara made), a spinach salad, idlis, mint sorbet and pears in caramel with blue cheese.   The recipes that haven’t already been posted on this blog are below:

Carrots with Orange and Chickpeas

500g of Carrots
50g of Butter
4 Garlic cloves
2 Teaspoons of cumin seeds
1 Tablespoon of oil
Zest of 1 orange and its juice
400g tin of chickpeas
1 Teaspoon of smoked paprika
Salt and pepper to taste.

Peel and bash or press the garlic.
Peel and slice the carrots into batons.
Drain the chickpeas.
Heat the butter and oil in a frying pan over a medium heat.
Add the cumin seeds and fry, stirring, until they brown slightly and release their fragrance.
Add the carrots and paprika and fry, stirring, for about ten minutes.
Turn the heat to low and add the garlic, orange zest, orange juice and chickpeas.
Cook until the chickpeas are heated through – about five minutes.Remove from the heat and season with salt and pepper.

Spinach Salad

250g of Fresh spinach leaves
50g of Pine nuts
1 Tablespoon of balsamic vinegar
Splash of Olive Oil

This is so easy, I’m not sure it’s fair to call it a ‘recipe’. Anyway……if you’re not using washed spinach leaves, then wash the leaves.
Otherwise, tip them into a bowl.
Gently brown the pine nuts and add them to the spinach.
Drizzle enough olive oil into the bowl to make all the leaves glisten.
Gently shake the balsamic vinegar over the salad.
Toss.

Mint Sorbet

300 mls of water
150 mls of sugar
20 Stalks of fresh mint
Strip the mint leaves from their stalks and rinse them in a sieve.
Bruise the leaves slightly with a pestle.
Put the sugar in a saucepan and pour the water over it.
Bring the sugar water to the boil and add the mint leaves.
Once the sugar has dissolved, remove the saucepan from the heat.
Leave the mint leaves to steep in the sugar-water for an hour or so.
Strain the mixture through a sieve into a plastic container and discard the mint leaves.
Once it has cooled, pop it into the freezer.
Leave overnight.
Remove from the freezer and, when the sorbet has started to thaw slightly, whizz it through your blender (or stab it a few times with your stick blender).
This will improve the texture of the sorbet.
Re-freeze.
About forty minutes prior to serving, move the sorbet to the fridge in order to ensure that it has thawed enough for you to get a spoon in to it between courses!

Pears in Caramel with Blue Cheese

100 mls of Water
200g of Sugar
300g cream
1 Tablespoon of Butter
1 Teaspoon of Ground Black Pepper
Pinch of Sea Salt
6 Pears

Unlike most of the recipes on this blog, this recipe serves six.

Halve the pears and scoop out the core and pips.
Put them on a baking tray, cut side down.
Heat your oven to 180 degrees and, when it’s hot enough, add your pears.
Leave them in the oven for about an hour, until they are browned and softened, but not squidgy and falling apart.

To make the caramel, heat a pot over a low-medium heat and pile the sugar in the middle of it.
Add the water and mix by gently shaking the pan rather than stirring the mixture (this prevents the sugar from crystallising).
When the sugar is dissolved, crank your stove up to medium-high until it bubbles.
Keep shaking the pan slightly while the sugar-water bubbles away for about another five minutes.
It will turn pale amber. This is the colour you want – if it gets any darker, it’s burnt and you’ll have to start again, which is a major PITA (pain in the ass).
Remove the saucepan from the heat and pour in the cream.
Continue to move the pan in a circular way to incorporate the cream.
Turn the stove back on low again to thicken the mixture.
Stir in the salt, pepper and butter.Remove from the heat again and leave to cool.
The mixture will thicken as it cools.
When it’s time to serve, assemble the pears on a serving platter, reheat the sauce and transfer it to a jug.
Serve the pears with the jug of caramel and a plate of blue cheese for people to help themselves.

I’m sorry I have no pictures, but I completely forgot to take any of the food!

Stone Soup

These days, the anxiety is worse than it has been for a while. Actually, it’s worse than it’s ever been – anxiety is a new one for me; I’ve only been dealing with it for a few months. But I’ll tell you this much – I wouldn’t wish it on my worst enemy. This isn’t a mental health blog, so I won’t go on about it, I’m only mentioning it because sometimes it keep me from leaving the house, answering the phone or engaging with anyone at all. Today is one of those days – the idea of leaving the house is too much for me. I can’t do it. I still, however, have kids to feed and that means I need to rustle something up with what’s in the house when that is, actually, very little.


So this is another version of stone soup


400g Salad Potatoes
4 Carrots
1 x 400g Tin of Chickpeas
300g Fresh Spinach
Sage
Salt & Pepper
1 Litre of Stock
600mls water
Oil

Wash and chop the potatoes.
Peel and chop the carrots.
Peel and chop the onion.
Drain the chickpeas.
Heat the oil in a large saucepan.
Add the onion, potatoes, carrots, salt, pepper and a good handful of the dried sage.
Sauté the lot for about five minutes, until the onion is softened.
Add the stock and about 600mls of water.
Bring to the boil.
Turn the stove down low, cover the pot and let simmer for about 20 minutes.
Add the spinach and stir through for about two minutes – until the leaves are just wilted.
Blend with your stick blender, adding more water if necessary.
Toss in the chickpeas and heat through for about another five minutes.
Serve with pasta, bread or rice to make a complete, filling meal.